
May 15th, 2007
When we moved into our house in Oregon, it had a presumptuous structure at the front gate declaring this to be "Sterling Creek Ranch". Now, it’s true that the house was located on Sterling Creek Road, but the creek flowing through the land is Poorman Creek. Obviously the previous owner was too proud to call this place "Poorman Creek Ranch".
The structure was massive: it had four logs on each side supporting a heavy crosspiece bearing the sign. However, the idiot who built it had planted the logs directly into the dirt. Guess what -- the logs rotted out and I had to pull the structure down.
But I always wanted to replace it, and in early 2007 I went to work. I designed a two-log structure that would hold a gargoyle on a platform suspended between the two logs. It would be simple to build -- or so I thought.
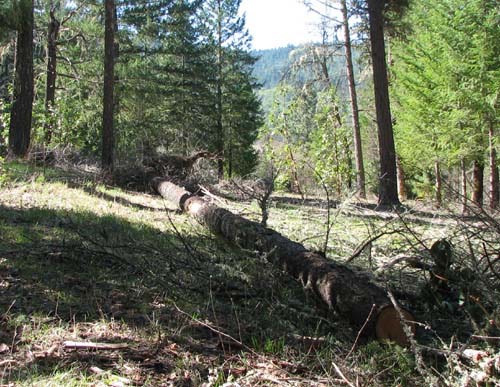
The first step was to get a log. That was no problem: we have lots of dead douglas fir trees on our land and I had only to select the best. In December of 2006 a windstorm had brought down a big tree, so I selected that. It had been dead for several years before it came down, but the wood was still strong. Here’s what it looked like after I removed the limbs:
Next I had to drag the log to the site. I hooked up a chain to my tractor and wrapped it around the log and dragged the log to the work site just across the road from its intended position:

Next, I had to clean the bark off the log:
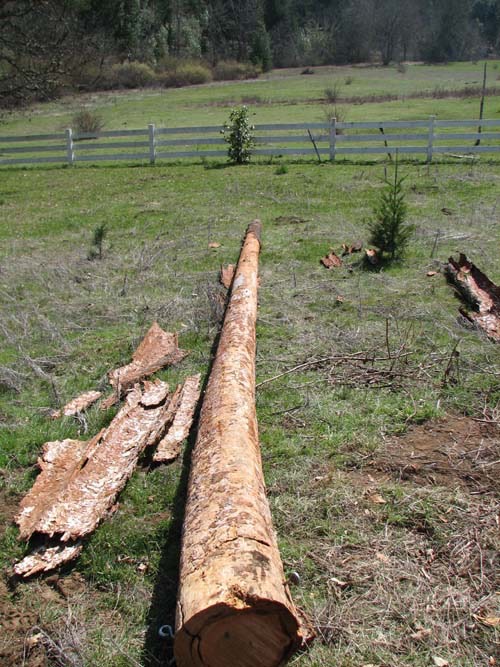
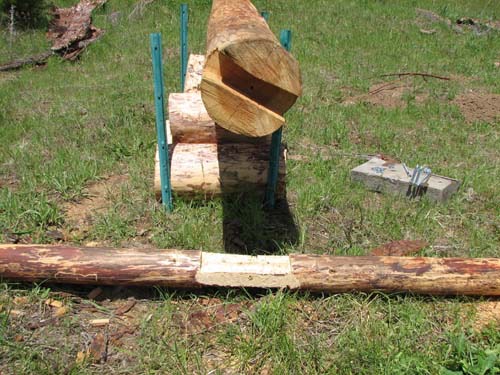
Notice the curvature at the near end of the log. I cut off six feet there to eliminate the curved segment. I also cut off about five feet at the other end. Then I cut a slot in the top for the crosspiece:
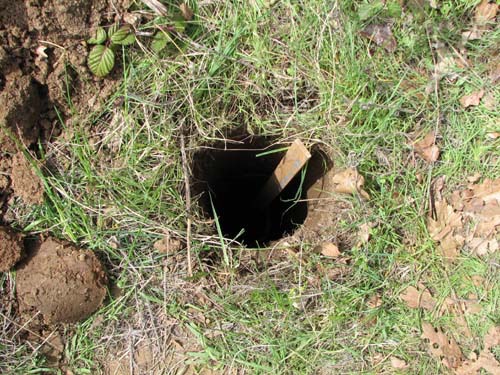
The next step was to dig the hole. Actually, I had started on this earlier, but digging is a slow process that stretched out over several weeks. I dug a sloping ramp into the hole for the log to enter cleanly:
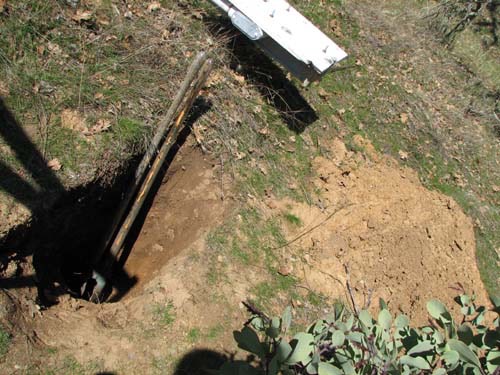
When I was done, the hold was four feet deep and just about twenty inches in diameter.
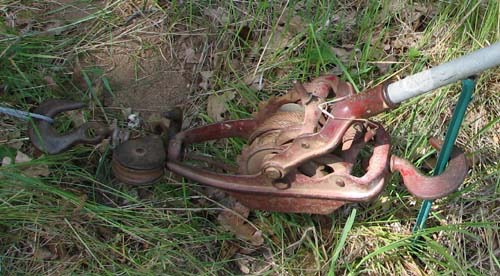
Now, at this point, I have to explain the physics of what I intended to do. The basic idea was to raise the log with a come-along (a ratchet-and-pawl device that uses leverage to allow you to pull very heavy loads:
However, the geometry was not good. Here’s a diagram of the forces that would be needed:
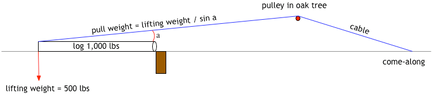
For an angle of 5 degrees, the pull weight would be about 5000 lbs. As you can see, the forces would be enormous because I was attempting to pull the log at too acute and angle. I needed to make that angle wider. How?
My solution was to break the job up into two parts: first I would lift the log partway, then I would apply the main pull. The first lift would look like this:

So I had to put a pole in place to raise the log partway up. So first I dug the hole for the pole. Since this was temporary, I couldn’t use concrete to support the pole. But I wanted it to be firmly held in place, so I dug the narrowest, deepest possible hole I could:
Finding a small pole was easy enough. I trimmed it to the right length, mounted a pulley on top, and shoved it into the hole. Then I hammered down the dirt into the hole around the pole so that it would be firmly held:
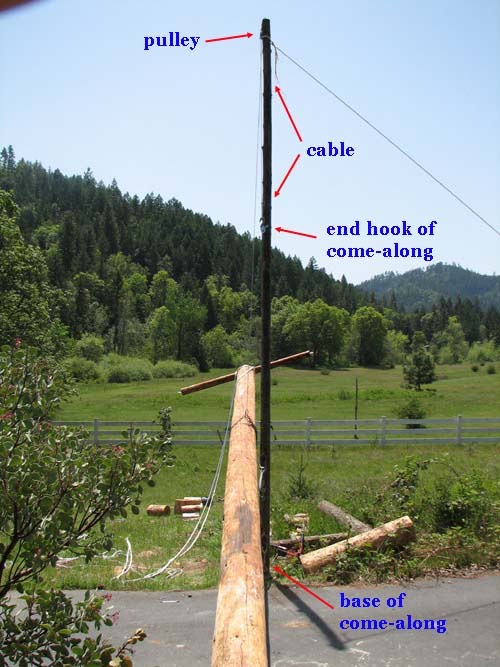
This gave me a strong pole fifteen feet high that I could use to lift the log. This secondary pole was about four inches in diameter:
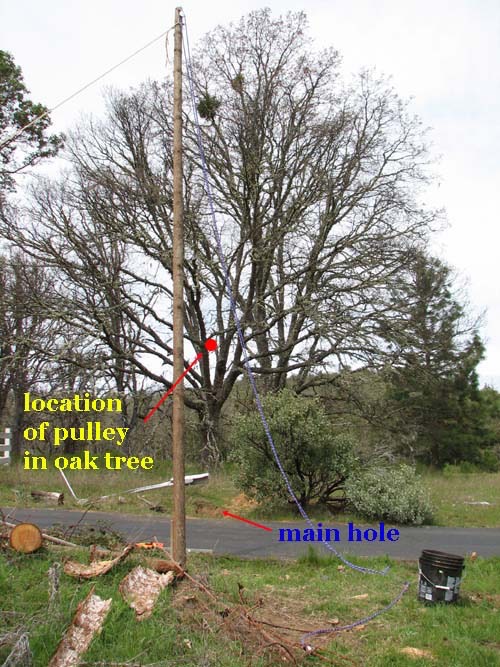
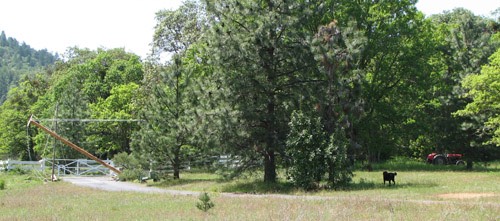
This photo shows the basic plan: the log would lie with its base at the main hole, and the top at the feet of the photographer. The cable would run from the top of the pole through the pully 30 feet away in the oak tree, and thence down to a come-along on the other side of the oak tree. The problem to observe here is that the angle from the main hole to the pulley is a small angle. That’s why we need the pole.
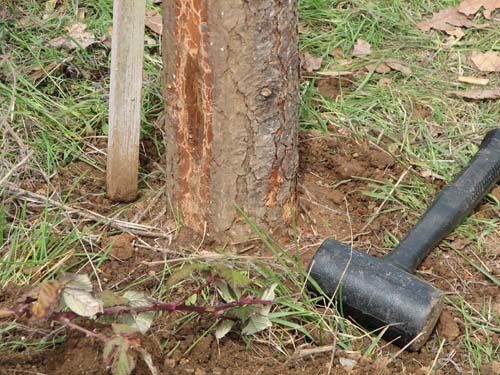
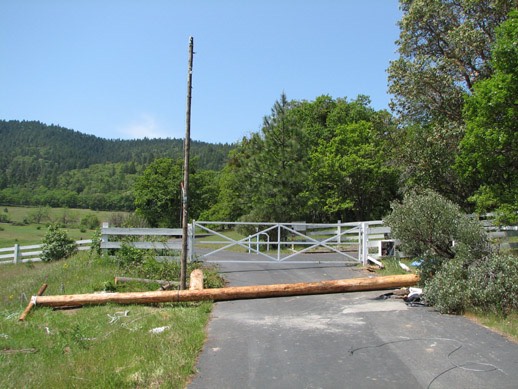
I spent a long time cleaning the surface of the log, painting the bottom end with a nasty green solution that prevents rot, and coating the upper surface with a water repellant. After all this work was done, I was ready to raise the log. I used the tractor to drag the log into position across the driveway. Until the log went up, nobody could go in or out of the driveway. So I had to hurry.
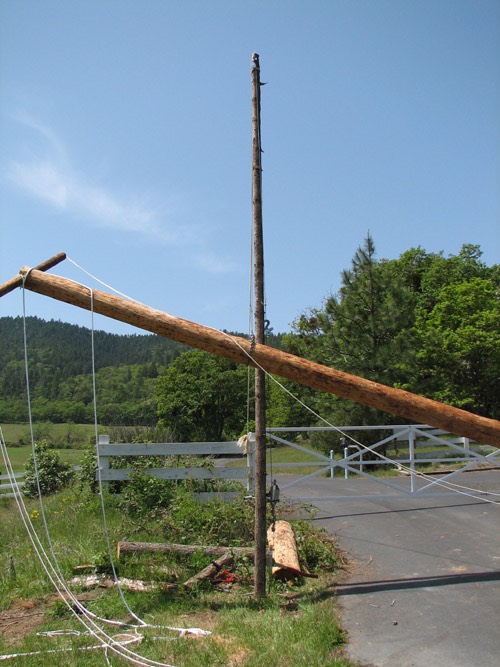
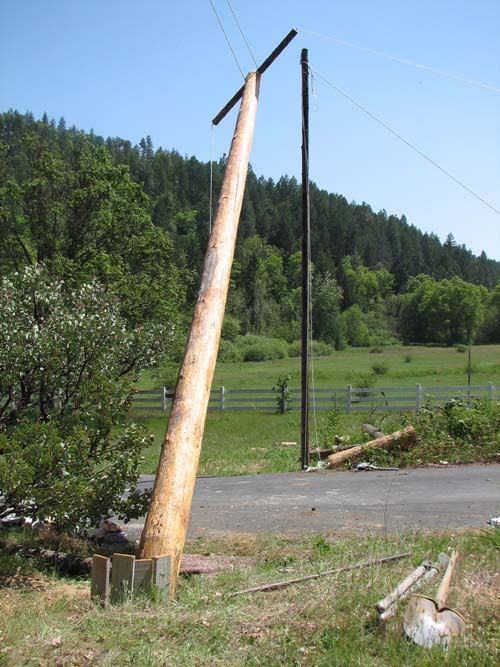
I hooked up a short bit of chain to the log and start hoisting it up via the pole:
This was the scariest part of the entire operation. To lift the log, I had to stand right next to it at the pole, operating the come-along. If anything failed, I could have been hit. I was safe from the log if it fell -- the pole would prevent it from falling onto me. But if the cable broke or the pole snapped, I would be in trouble. I stopped every few inches and walked all around, looking at everything from different angles, looking for any evidence of bending or twisting. Everything stayed perfectly straight. So I kept going up:
Now, when you realize that I was working at that come-along, it looks from this angle as if I’m directly underneath the log. That is not the case. I was just four inches away from being underneath the log. Four inches may not sound like much safety margin, but I had the pole between me and the log. No matter what happened, that log could not possibly fall on me.
At this point I was ready to hook up the primary lifting system. The big white rope that you see dangling from the crossbar at the top of the log provided me with the hookup. I just hooked up the steel cable and everything was in place. Here’s the grand view:
In this photograph, the oak tree with the pulley is hidden behind the pine tree in the center foreground. The fat white rope is visible extending horizontally from the top of the log; the steel cable continues from there through the pulley to the tractor. I did not use the tractor for pulling the log up; that would have been reckless. I wanted to go up an inch at a time so I could pause and check my progress every few inches. Here’s the super-size come-along that I hooked up to the tractor:
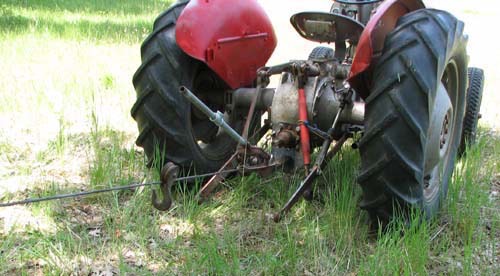
I was using the tractor only as a solid anchor point, nothing more. It turned out that my calculations were too pessimistic; I had no problems at all raising the log. The come-along made easy work of it.
Once I had the log well-supported by the main cable, I disconnected the chain that had provided the first-stage lifting. I also hooked up one of the guy ropes to keep the log from swinging sideways; you can see it extending to the right from the end of the crossbar. Notice also the boards I had placed on the near wall of the hole; these insured that, as the log settled into the hole, it would not scrape dirt onto the cement floor I had poured in two days earlier.
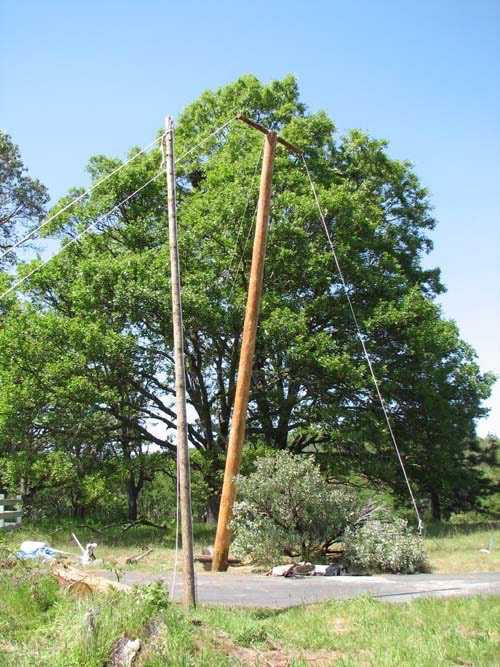
This shows the log almost in position. I had set up two guy ropes to control its position. Next, I used those guy ropes to draw in additional guy ropes so that I had five ropes controlling the position of the log:
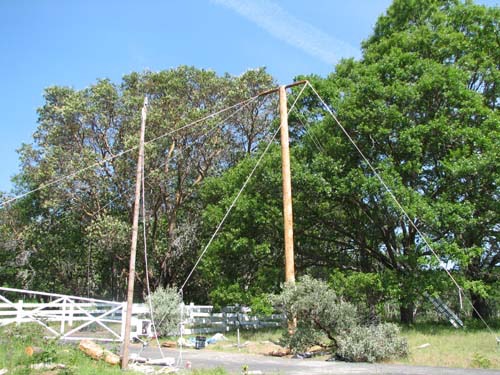
At this point, the tricky work was done. Now all I had to do was pour the concrete. This was still a laborious task, as the hole required a total of 640 pounds of concrete, all of which I mixed and poured by hand. I was very tired at the end of the day! But when it was all done, the log was in position, perfectly vertical, and ready to go. Now all I needed to do was put up the second log. This, however, could wait a while; I was in no mood to repeat this entire process once again.
But I did anyway, and here is the story of the second log.