July 4th, 2010
Last fall Kathy expressed her desire to have more ducks (we had only two at the time) and, more importantly, to have a better pen for them. They were living in a chicken coop with an open air annex. We had installed a water tank in the open air annex, but it is only about four feet long by two feet wide, and ten inches deep. It filled up with gunk and algae within a week of cleaning it out; all in all, it really wasn’t adequate for the ducks’ needs. So I set to work thinking about a new pen for the ducks.
My basic plan was for an annex to the chicken coop on the side opposite the old annex. But where the old annex was six feet wide by ten feet long, this annex would be huge: a circular structure 35 feet in diameter. It also had to be secure against predators. That imposed quite a few restrictions: predators can dig underneath the fence, climb over the fence, or dive down from above. My pen had to be proof against all these avenues of attack.
The defense against raptors would require a roof, but the pen included several large trees: a Douglas Fir inside, three more along the perimeter, and an oak inside. These would drop needles and leaves onto the roof, creating a potential problem as the weight of these built up over the years. I could solve this problem with an open roof, a spiderweb built from twine, but such a roof would sag under its own weight; that meant that it would have to be rather high if we weren’t to be brushing our heads against it. Therefore, the side posts supporting the roof had to be eight feet high. Posts that high must also be fairly wide if they’re not to lean under the stress, so I’d need some large posts: logs.
There was no problem acquiring a stock of logs; our forest is full of dead trees. Throughout the fall I selected appropriate logs and dragged them to the work area with the tractor. I had to limb them (cut off all the broken branches) and clear off the bark (insects live underneath the bark and eat the wood).
The next consideration was defense against digging predators. I’d have to have an underground barrier. My solution used a large cache of cedar boards we had salvaged from a collapsing old fence. These boards are eight inches wide and were originally six feet long, but the ends had rotted enough that I’d have to cut them down to about five feet, six inches. My plan was to attach them to the base of the logs, placing the lowest two inches underground, leaving six inches above ground. This in turn required that the logs be spaced five feet six inches apart. A circular pen with diameter of 35 feet has a circumference of about 100 feet; I’d need about 18 logs to cover that distance.
Unfortunately, the positions of the existing trees interfered with the neat geometry. You can’t plant a log-pole within three feet of a tree, because you’ll run into thick roots. Moreover, the new fence would have to connect neatly with the existing chicken coop, with gates on the two sides of the coop. All these constraints made the planning rather tricky, but I eventually came up with a layout that worked: a lopsided circle incorporating three trees into the circumference.
It was now December and I set to work digging the post holes for the logs. Each post hole had to be dug for its log, to insure a tight fit. The logs were ten feet long and five to nine inches in diameter. I dug holes two feet deep, carefully measuring the depth. I also brushed multiple coats of cupric naphthenate onto the bottom two feet of each log to preserve it against rot. Although brushing it on is not as effective as pressure treatment, I was able to get pretty good results by brushing on additional coats at intervals of 24 hours, spread over several days. This gave time for the stuff to soak deep inside the wood. Cupric naphthenate really stinks!
Once the log was ready, I tilted it into place and dropped it down into its hole. Yes, these logs weigh about 150 pounds. But they’re not that hard to handle; you lift one end (only 75 pounds effective weight) then give it a mighty upward heave and get your hands on it over your head. The effective weight that you feel falls as it gets closer to vertical, so it really isn’t that hard to handle. Once it’s vertical, you grab it in a bear hug and walk it the few inches to the post hole and drop it in.
All through the winter I dug holes, applied cupric naphthenate, and planted logs. I had to delay during January when the logs froze so solidly that the cupric naphthenate couldn’t soak in. But by mid-February all the posts were in place. Now it was time to install the Boss Log, the central post that would support the roof. This had to be four feet higher than the other logs, so I selected a fourteen-foot log. Because it was taller, it had to be larger in diameter as well. Thus, my central post log was huge and weighed something like 300 pounds -- too heavy for me to lift. So I had to arrange a cable rig to hoist it up. This proved to be rather complicated, because I was installing it on a slope only four feet away from one of the trees. The main cable would lift it but I needed to set up side ropes to prevent it from shifting sideways as I lifted it. I had to use jacks to lift it the first three feet. I used the same technique that I used in setting up the Gargoyle Gate; you can see that technique illustrated here, but for that project I was using much larger logs. The log got into place with a modicum of grunting and cursing.
I used another trick to extend the life of the posts: pounding dirt. You can read more about this technique here. All in all, I figure that, between the copper naphthenate, the pounded dirt, and the size of the logs, this pen should be solid for at least twenty years, and may be usable for thirty. I’ll be dead by then, so I don’t care what happens after that. It was about this time that a visiting friend viewing the circle of big logs dubbed it “Duckhenge”. We embraced the name.
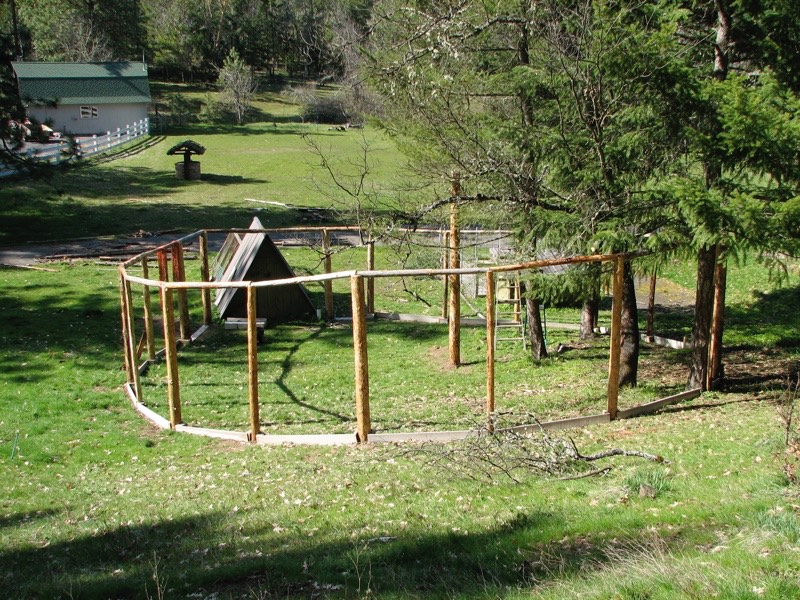
With all the posts in place, I set to work placing the cedar boards. I had to build special yokes out of 2x6 lumber to give the cedar boards something to attach to. A flat board against a round log doesn’t make a solid connection. The yokes solved that problem. Next came the pieces connecting the logs at the top; these were important to stabilize the logs positions (the cross pieces would combine their strengths) as well as to provide anchors for the roof twine.
All this work was complete by early April; here’s what it looked like:
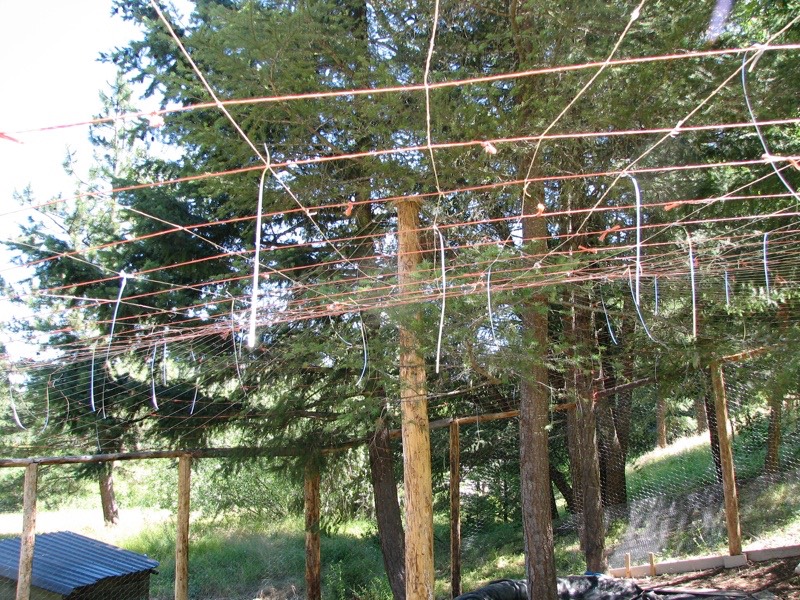
The next task was to build the roof. This had to be a spiderweb with spacings of no more than 12 inches. Unfortunately, there was no easy way to build it: I’d just have to weave the whole thing by hand. So first I laid out the radial lines from the top of the central pole to the peripheral logs. One radial line went from the top of the central pole to the top of each peripheral pole. Next I placed the circumferential lines using baling twine, of which I had huge amounts that had accumulated from years of feeding hay to the burros. Here I made a mistake: the radial lines were made of lighter twine than the circumferential lines. I did this because I had a huge roll of the lighter twine and it could be carefully measured in advance and have slipknots placed at measured intervals. But those radial lines support the entire weight of the roof and they’re under a lot of strain. That was a mistake.
Since the roof was always at least eight feet overhead, I had to use ladders to build the spiderweb. I could make two or three knots from each position; then I’d have to climb down, move the ladder, and tie two or three more knots. The roof required 1300 knots. Here’s what it looks like from below:
The next task was to install the chicken wire. This is not as straightforward a task as one might think. If the fence were straight, flat, and level, it would be easy, but this fence curves AND changes elevation. That requires the chicken wire to twist up and down, which chicken wire does not do gracefully. I had to do lots of fudging and twisting to get a decent fit. I used a staple gun to secure the chicken wire to the poles; I went through a big box of staples.
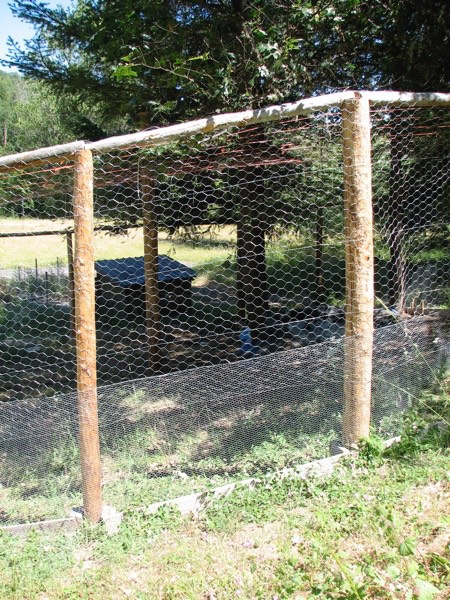
The upper six feet of the cage used two-inch chicken wire but we wanted to use aviary wire for the lower three feet; this would prevent predators from reaching in and mauling ducks. Don’t dismiss this possibility; it actually happened to us about twenty years ago when a bobcat grabbed a duck’s wing and tore it off. Fortunately the vet was able to clean up the duck and he survived, but we called him “Lefty” thereafter and he went around in circles whenever he flapped his wing. We wired together the two wire fabrics where they overlapped. The bottom of the aviary wire was stapled to the cedar boards. Here’s a typical section of fence:
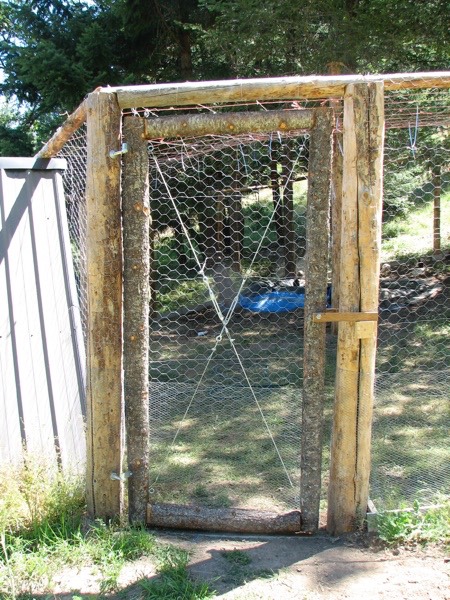
It was now early June and Kathy’s ducklings would arrive any day now. They wouldn’t go into the pen until they were big enough, but time was running out. The next task was to build the gates. This was a tricky job; gates can go wrong in a hundred ways. They had to fit closely, lest a predator be able to squeeze through. They also had to be openable from both sides -- that’s a bit of a problem if you can’t reach over or around the gate, as is the case here. To maintain the loggy ambience of the pen, I used logs for the gates. Lots of careful measurement and remeasurement went into the process; when I was done, they fit pretty well:
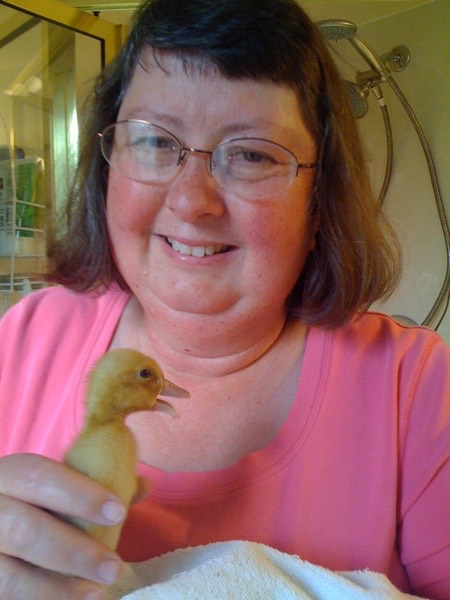
It was about this time that the ducklings arrived. Kathy had ordered twelve ducklings of several different breeds. Here’s Kathy with an Indian Runner:
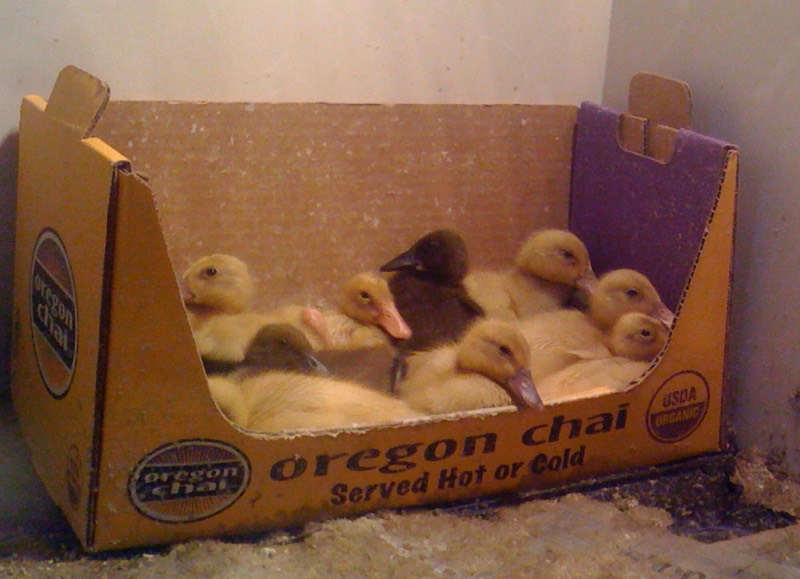
and here they are in their box in the shower, where they lived the first two weeks of their lives:
I was running out of time; with the gates done, I was ready for the final job: the pond. I had been planning this all along and I knew what had to be done. First I dug out a hole on the slope under the trees and piled up the dirt into the beginnings of a dam. Then I built the main dam structure out of rock; here it is during construction:
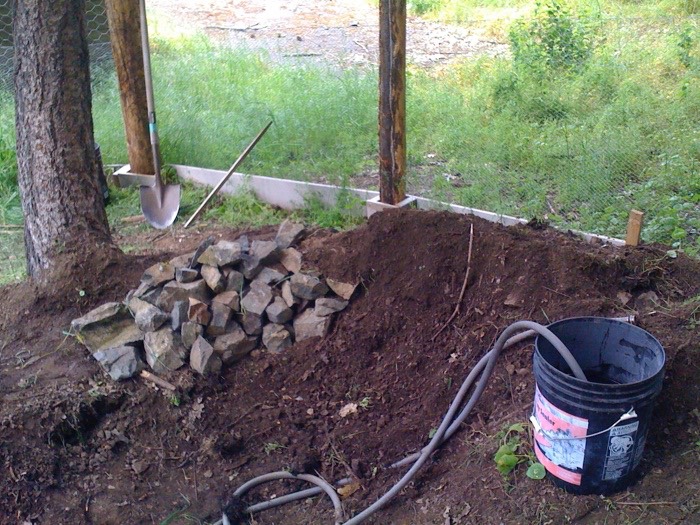
(The bucket and hose are used as a siphon to determine level and insure that the dam is equally high everywhere. You’d be surprised at how bad a job is done by simply eyeballing the level.)
The rock itself had to be gathered from around the land. This was a bit of a job; I had to use the tractor and the wagon to collect rock and carry it to the dam site. On one rock run I overloaded the cart and one of its wheels broke. After that I used the larger trailer to gather the rock.
Before the dam was completed I had to lay the drain pipe; this would permit me to drain the pond for cleaning, an absolute necessity when you have ducks, for whom a pond doubles as a toilet. Because there would also be needles, twigs, and leaves falling into the pond, I needed a large drain pipe; I chose two inch pipe. I was worried that I wouldn’t have a steep enough slope in the pipe to drain the pond effectively, but a consultation with reference data on sewage systems set my mind at ease.
Here’s the completed hole plus dam:
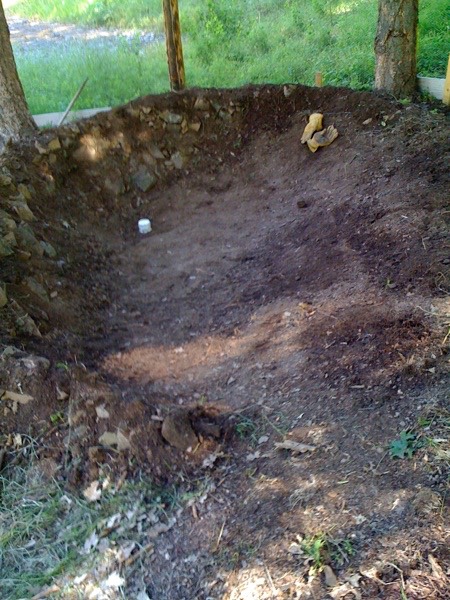
We purchased a piece of pond liner for the pond. The pond liner presented us with a number of problems. First, there’s no way that a flat pond liner can neatly fit inside a curved hole; there must be what tailors call “darts” where the liner folds over itself. Most of these were small enough to be tolerable, but there were a few places where the curvature was so great as to give cause for worry. Much tougher was the problem of protecting the pond liner from the sharp corners of rocks in the dam. Even at a depth of only twelve inches, the water exerts a lot of pressure on the pond liner, pushing it up hard against the surface underneath. If that surface includes the sharp edge of a rock, the liner will tear and leak. So I had to cover the rock dam with a thick layer of dirt. Then I covered it again with two layers of an old tarp. Finally, I covered the upper portion of the dam with chunks of old carpet to provide additional protection. The pond liner went on top of that. I had to cut a hole in the liner for the drain pipe, but I used silicon sealer and an extra layer of liner material. The final step was to secure the edges of the liner so they wouldn’t flip over.
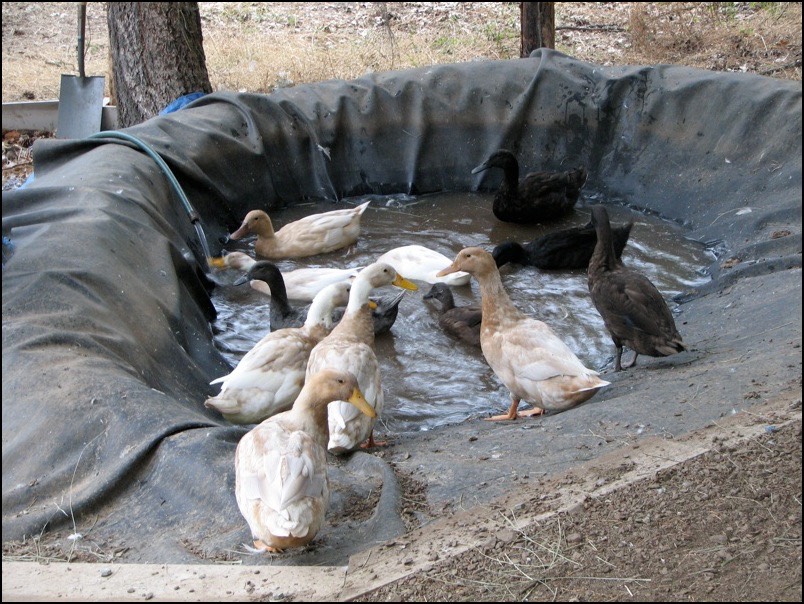
We filled the pond with water and everything held. We monitored it closely for a week but everything worked perfectly. And on July 3rd, we released the ducklings, now lanky teenagers, into Duckhenge. They didn’t like the pond, but they loved all the extra space. They’ll take to the pond sooner or later. Here’s a photo of them as adults, frolicking in the pond while it’s being filled:
